> ## Documentation Index
> Fetch the complete documentation index at: https://docs.altnautica.com/llms.txt
> Use this file to discover all available pages before exploring further.
# Quickstart: Mission Control
> Run the browser-based GCS in under 5 minutes. No drone required.
## What You Will Build
By the end of this page, you will have ADOS Mission Control running in your browser with 7 simulated drones. You can explore the dashboard, plan missions, try the configuration panels, and fly a simulated drone with your keyboard or gamepad. No hardware needed.
## Prerequisites
You need:
* **Node.js 20+** (LTS recommended). Check with `node --version`
* **npm 9+** (ships with Node.js). Check with `npm --version`
* **Git**. Check with `git --version`
* A modern browser: Chrome, Edge, or Firefox. Chrome recommended for WebSerial support.
Mission Control uses WebSerial for USB flight controller connections and WebUSB for firmware flashing. Both require a Chromium-based browser (Chrome, Edge, Brave). Firefox works for everything except USB features.
## Option A: Demo Mode (No Clone Needed)
The fastest way to try ADOS Mission Control is the hosted demo at [command.altnautica.com](https://command.altnautica.com).
It loads with 7 simulated drones, demo telemetry, and all features enabled. Nothing to install. Just open the link.
## Option B: Run Locally
```bash theme={"theme":{"light":"github-light","dark":"github-dark"}}
git clone https://github.com/altnautica/ADOSMissionControl.git
cd ADOSMissionControl
```
```bash theme={"theme":{"light":"github-light","dark":"github-dark"}}
npm install
```
This takes 1-2 minutes. The project uses Next.js 16 with React 19 and about 60 dependencies.
```bash theme={"theme":{"light":"github-light","dark":"github-dark"}}
npm run demo
```
This starts the development server on port 4000 with demo mode enabled. Open [http://localhost:4000](http://localhost:4000) in your browser.
Demo mode sets `NEXT_PUBLIC_DEMO_MODE=true` and populates the dashboard with 7 simulated drones showing live-updating telemetry. It requires no Convex backend, no SITL, and no hardware.
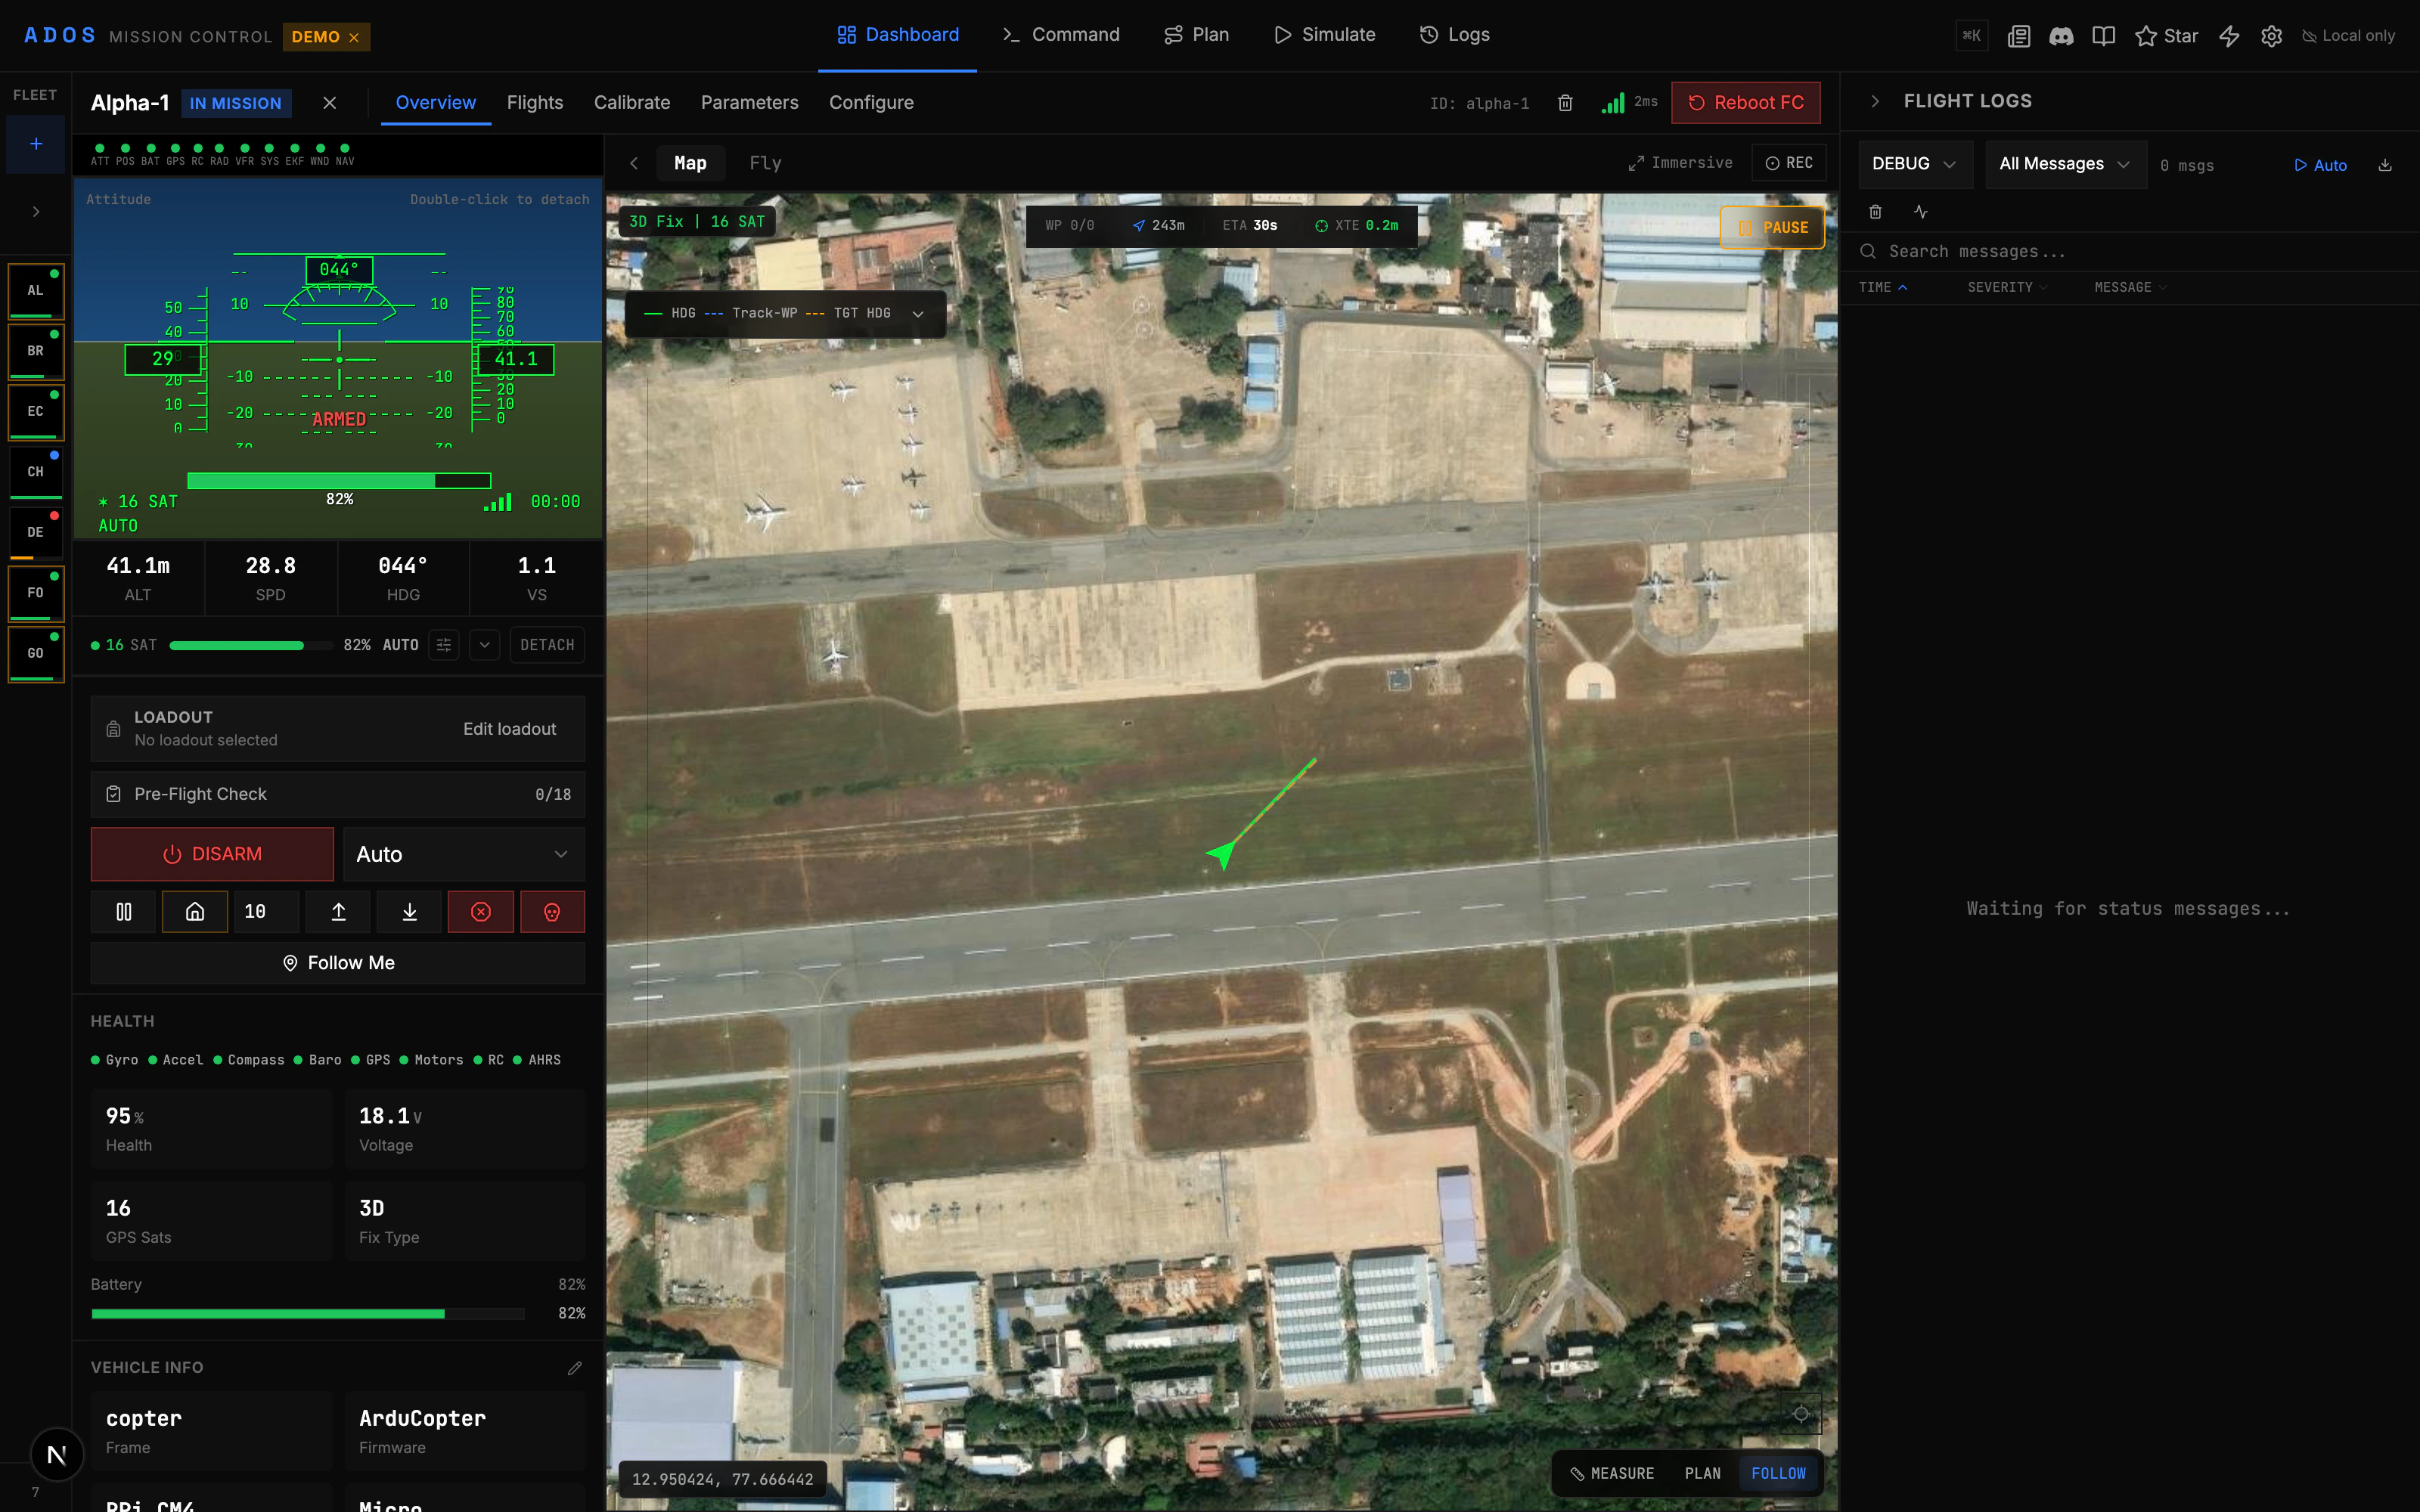
You should see the main dashboard with 7 simulated drones. Each drone shows:
* Attitude indicator (artificial horizon)
* GPS coordinates and altitude
* Battery voltage and percentage
* Flight mode (Stabilize, Loiter, Auto, etc.)
* Connection status
 ## Exploring the UI
With demo mode running, click through the main tabs to see what is available.
### Dashboard
The home view. Shows all connected drones as cards. Click a drone card to select it and see its detail view.
### Plan
The mission planning interface. You can:
* Drop waypoints on the map by clicking
* Use pattern generators (survey grid, corridor scan, expanding-square search, and more)
* Set altitude, speed, and camera trigger parameters per waypoint
* Draw geofences and set rally points
* Import and export missions in multiple formats (QGC WPL, KML, CSV)
## Exploring the UI
With demo mode running, click through the main tabs to see what is available.
### Dashboard
The home view. Shows all connected drones as cards. Click a drone card to select it and see its detail view.
### Plan
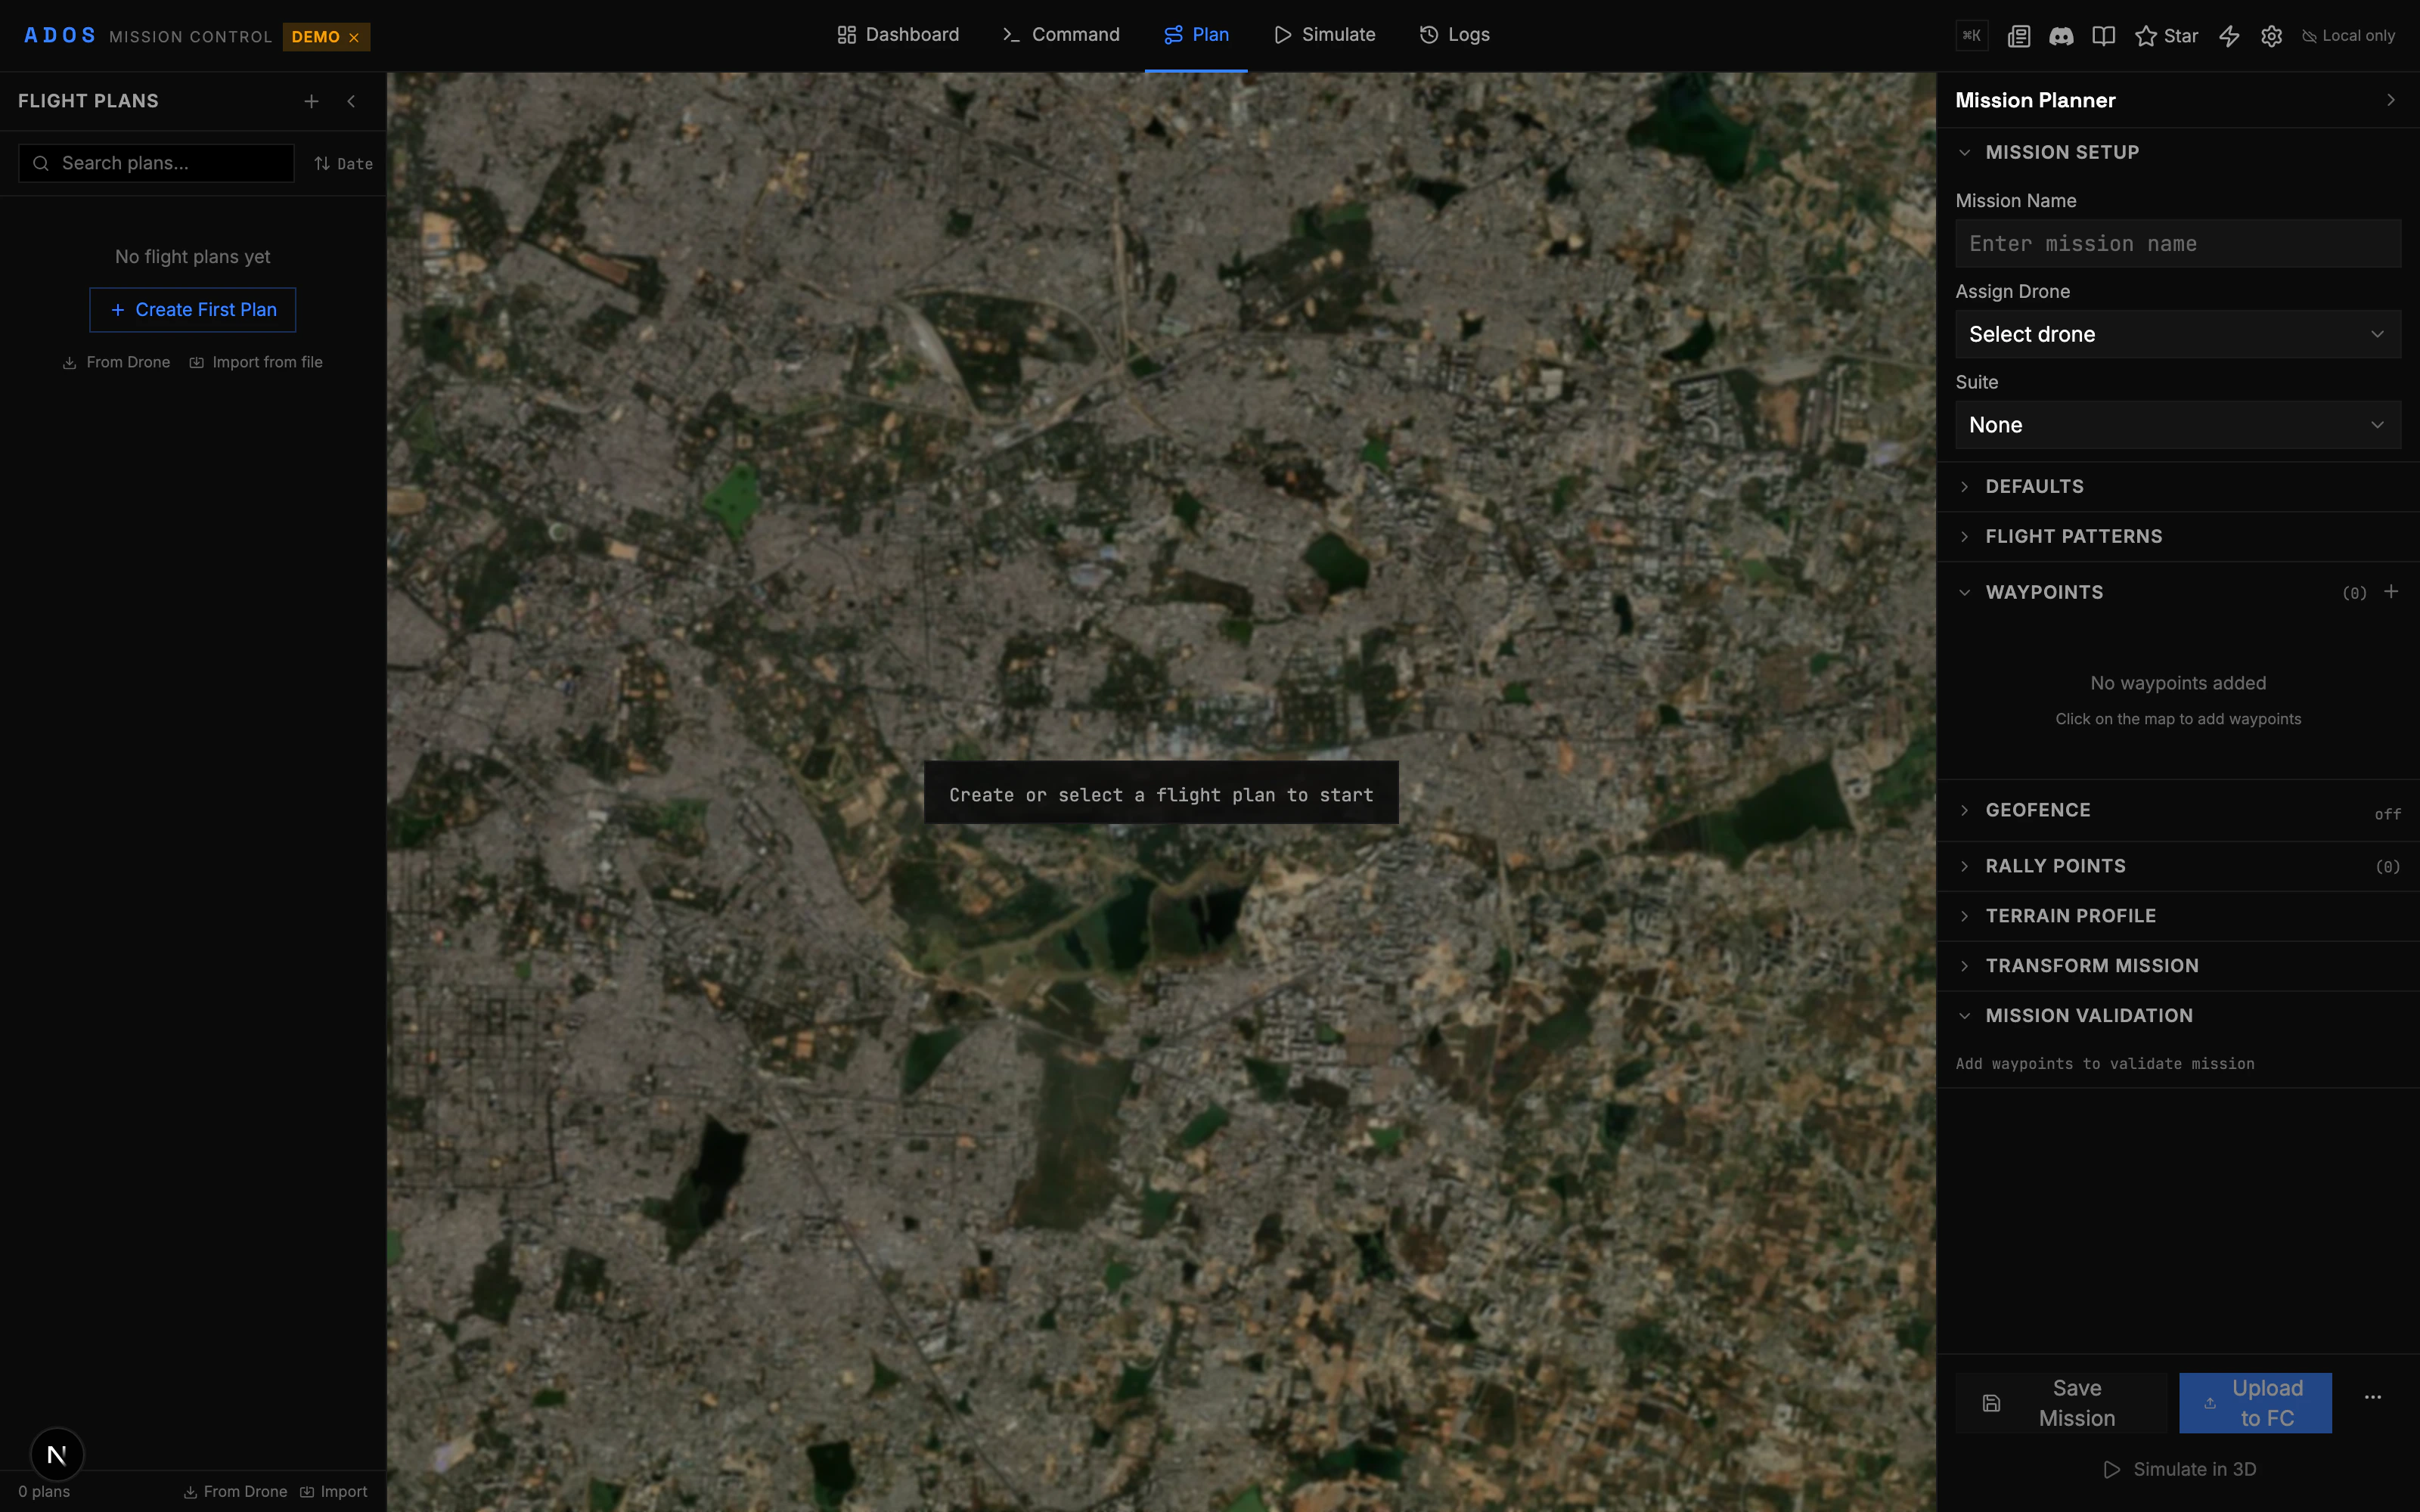
The mission planning interface. You can:
* Drop waypoints on the map by clicking
* Use pattern generators (survey grid, corridor scan, expanding-square search, and more)
* Set altitude, speed, and camera trigger parameters per waypoint
* Draw geofences and set rally points
* Import and export missions in multiple formats (QGC WPL, KML, CSV)
 ### Configure
60+ configuration panels for your flight controller. In demo mode, these show example values. With a real FC connected, you can read and write parameters.
Key panels include:
| Panel | What It Does |
| ---------- | ------------------------------------------------------ |
| Failsafe | Battery, GCS, and RC loss behavior |
| PID Tuning | Rate and stabilize PIDs with live response graph |
| Power | Battery monitor setup (voltage divider, amps per volt) |
| OSD Editor | Drag-and-drop on-screen display layout (4 screens) |
| Ports | Serial port protocol assignment (25+ protocols) |
| Sensors | Rangefinder, optical flow, airspeed, barometer config |
| Gimbal | Mount type, axis limits, ROI targeting |
### Flight Control
Manual flight controls. This tab shows when a drone is selected. You can:
* Arm and disarm
* Change flight modes (25+ modes for ArduPilot)
* Fly with a gamepad or HOTAS at 50Hz input rate
* Fly with keyboard (WASD + arrow keys)
* Set guided mode waypoints by clicking the map
### Simulate
3D mission simulation. Upload a mission plan and watch it execute with terrain following, camera trigger markers, and timing estimates.
## Connecting a Real Flight Controller
If you have an ArduPilot, PX4, Betaflight, or iNav flight controller on your desk, you can connect it right now.
Stop the demo server (`Ctrl+C`) and start normally:
```bash theme={"theme":{"light":"github-light","dark":"github-dark"}}
npm run dev
```
Open [http://localhost:4000](http://localhost:4000).
Connect the FC to your laptop with a USB cable. Make sure it is powered (some FCs need a battery connected for USB to work, others do not).
Click the **Connect** button in the top navigation bar. A browser dialog will appear listing available serial ports.
### Configure
60+ configuration panels for your flight controller. In demo mode, these show example values. With a real FC connected, you can read and write parameters.
Key panels include:
| Panel | What It Does |
| ---------- | ------------------------------------------------------ |
| Failsafe | Battery, GCS, and RC loss behavior |
| PID Tuning | Rate and stabilize PIDs with live response graph |
| Power | Battery monitor setup (voltage divider, amps per volt) |
| OSD Editor | Drag-and-drop on-screen display layout (4 screens) |
| Ports | Serial port protocol assignment (25+ protocols) |
| Sensors | Rangefinder, optical flow, airspeed, barometer config |
| Gimbal | Mount type, axis limits, ROI targeting |
### Flight Control
Manual flight controls. This tab shows when a drone is selected. You can:
* Arm and disarm
* Change flight modes (25+ modes for ArduPilot)
* Fly with a gamepad or HOTAS at 50Hz input rate
* Fly with keyboard (WASD + arrow keys)
* Set guided mode waypoints by clicking the map
### Simulate
3D mission simulation. Upload a mission plan and watch it execute with terrain following, camera trigger markers, and timing estimates.
## Connecting a Real Flight Controller
If you have an ArduPilot, PX4, Betaflight, or iNav flight controller on your desk, you can connect it right now.
Stop the demo server (`Ctrl+C`) and start normally:
```bash theme={"theme":{"light":"github-light","dark":"github-dark"}}
npm run dev
```
Open [http://localhost:4000](http://localhost:4000).
Connect the FC to your laptop with a USB cable. Make sure it is powered (some FCs need a battery connected for USB to work, others do not).
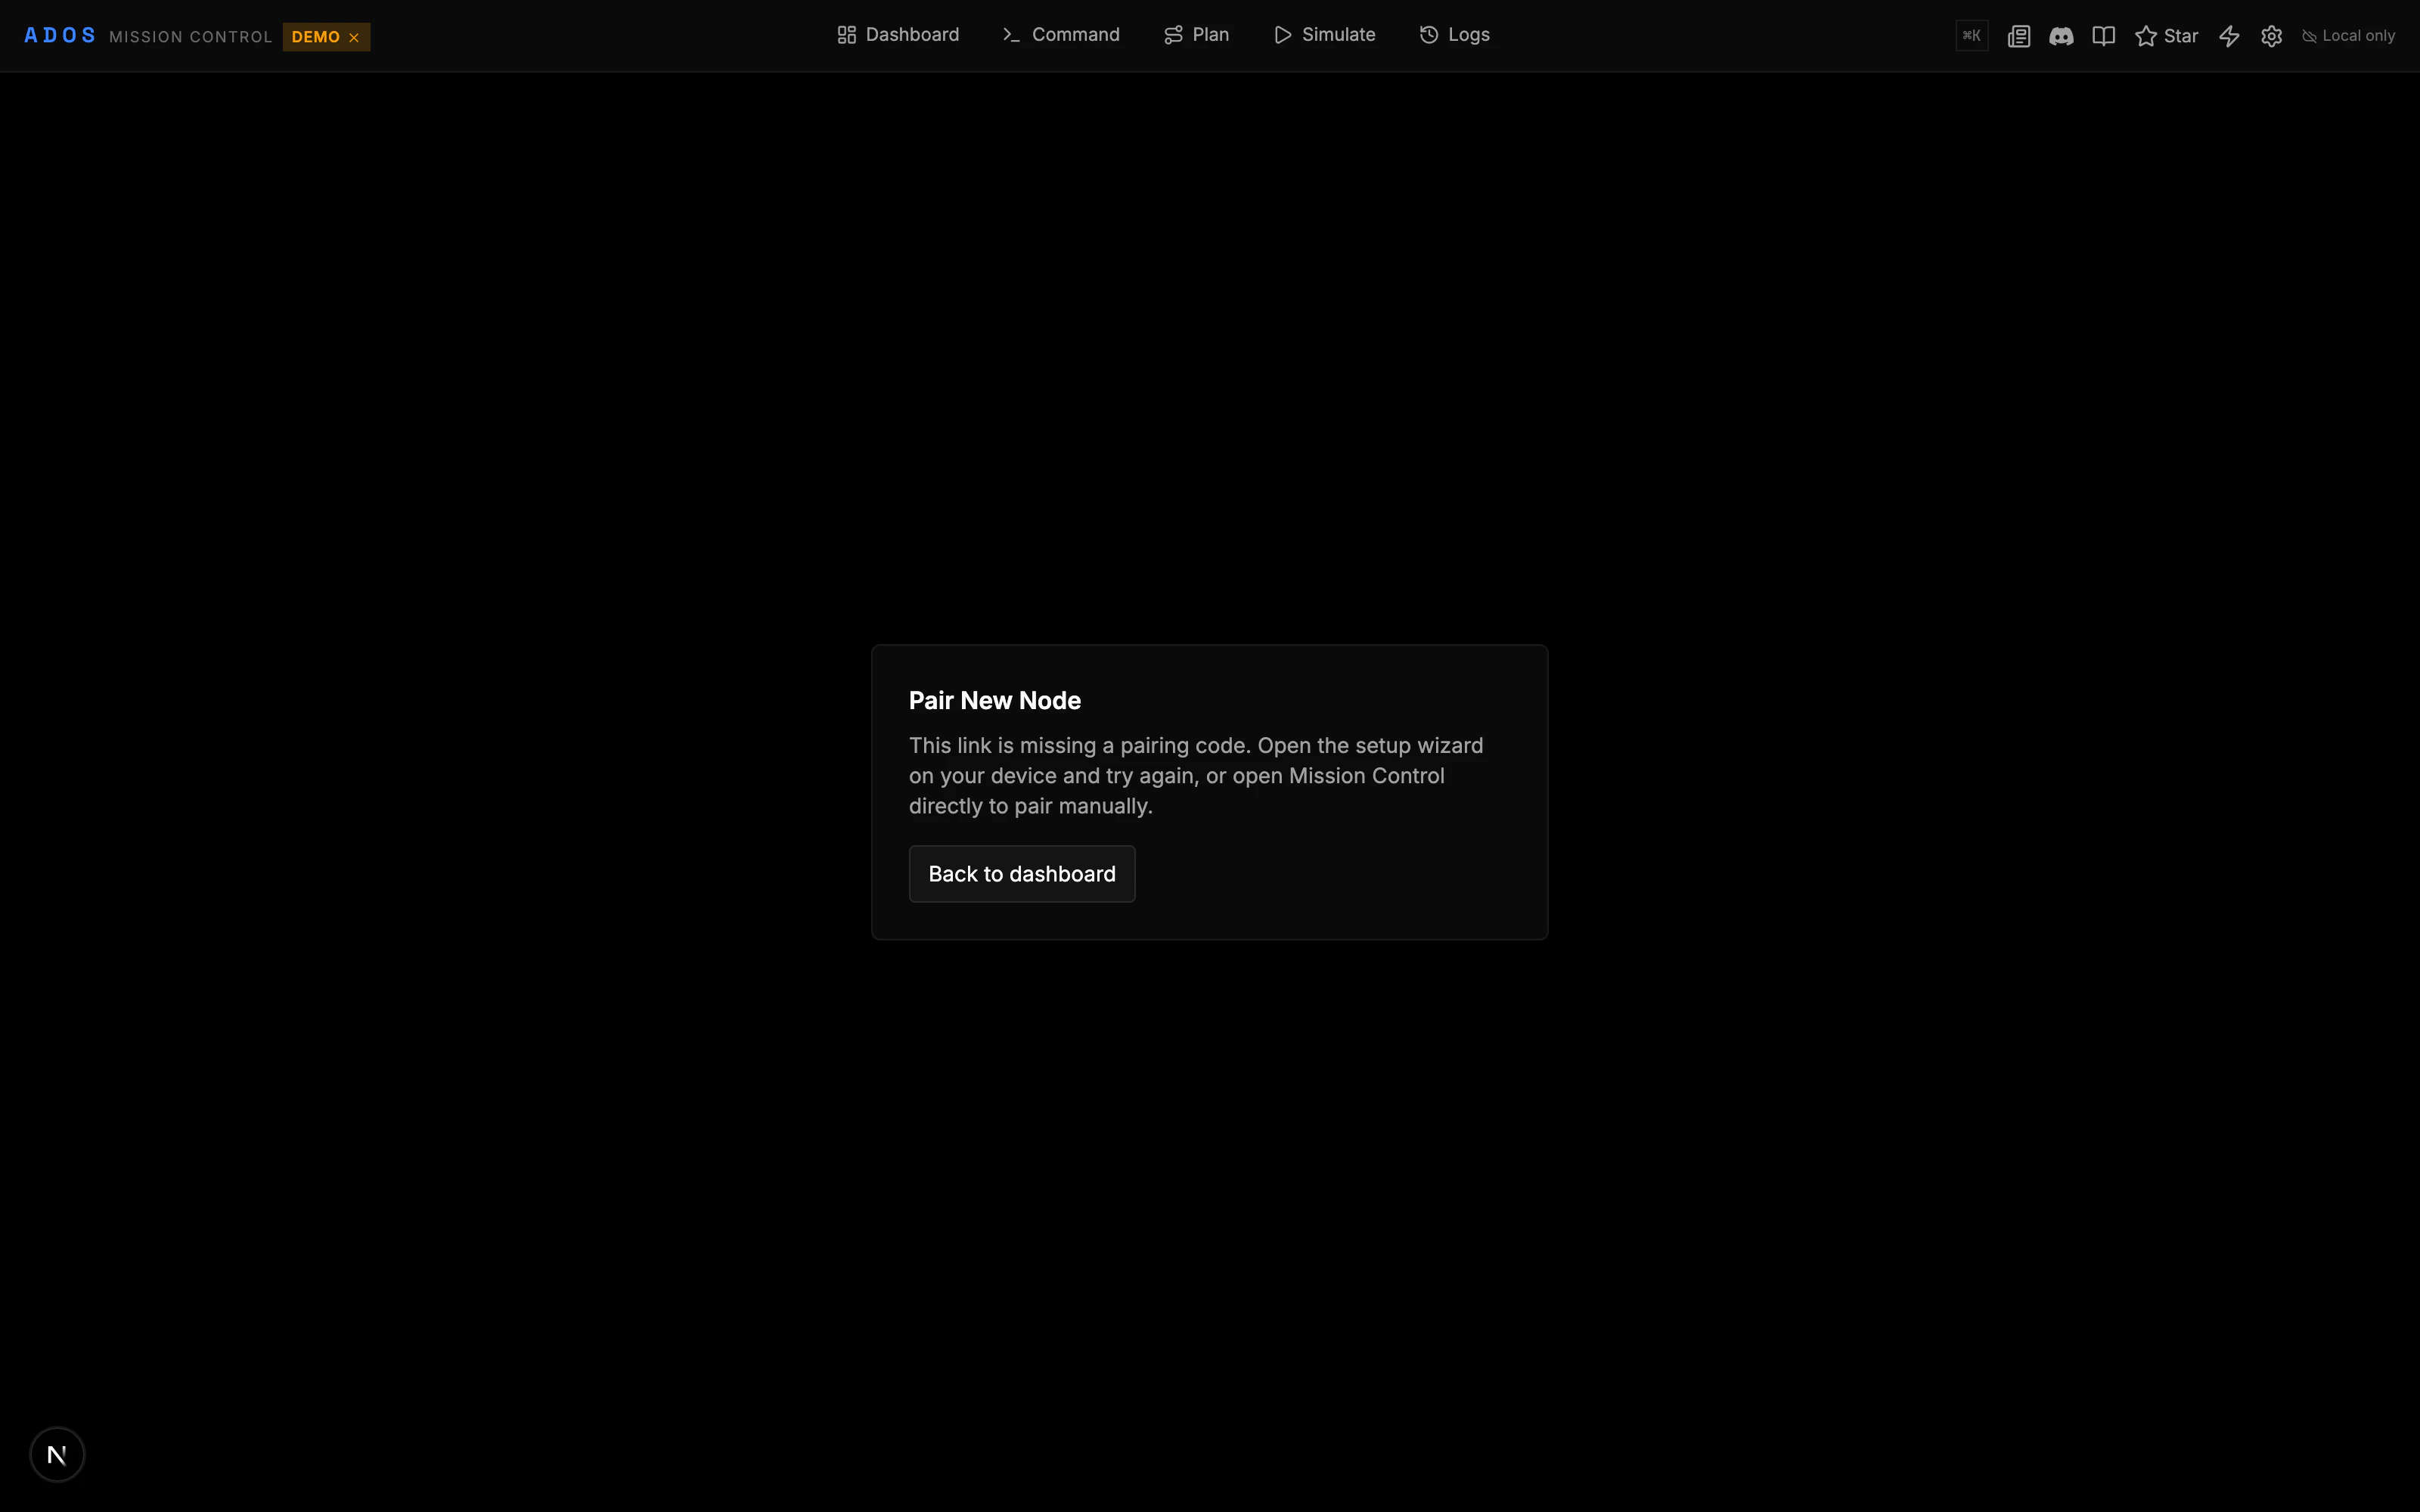
Click the **Connect** button in the top navigation bar. A browser dialog will appear listing available serial ports.
 Select your flight controller and click **Connect**. Mission Control will:
1. Open the serial port at the detected baud rate
2. Send a MAVLink heartbeat
3. Request autopilot version and capabilities
4. Request data streams (attitude, GPS, battery, RC, sensors)
5. Download the full parameter list
This takes 2-5 seconds.
The top bar will show the firmware type (ArduPilot, PX4, Betaflight, or iNav), vehicle type (Copter, Plane, Rover, etc.), and firmware version. The dashboard card will show live telemetry.
If connection fails, check:
* Is the FC powered?
* Is another application (Mission Planner, QGroundControl, Betaflight Configurator) holding the serial port?
* Are you using Chrome, Edge, or another Chromium-based browser? Firefox does not support WebSerial.
This applies to the **direct USB** path only. WebSerial, WebUSB, and Web Bluetooth need a secure context. On `http://localhost:4000` they work. To use these browser features from another machine over the network, you need HTTPS (or the [desktop app](#running-as-a-desktop-app), which has native serial access with no browser restriction). The hosted version at `command.altnautica.com` uses HTTPS.
This does **not** apply to connecting over the network to the ADOS Drone Agent or a MAVLink router. Those go over a WebSocket and need no secure context. See the plain-HTTP LAN self-host path below.
## Self-Hosting on the LAN over Plain HTTP
You do not need HTTPS, the cloud, or a Convex account to run Mission Control against a real drone on your own network. The ADOS Drone Agent serves plain HTTP on port `8080`, and the GCS connects to it directly.
Start the GCS on your own machine and open it over plain HTTP:
```bash theme={"theme":{"light":"github-light","dark":"github-dark"}}
npm run dev
```
Open `http://localhost:4000`, or reach it from another device on the LAN at `http://:4000`.
Keep the GCS on `http://` for LAN self-hosting. When the page is served over `https://`, the browser blocks it from fetching a plain-HTTP agent (mixed content), and the GCS falls back to the cloud relay. Plain HTTP keeps the connection local and direct.
In the fleet sidebar, use the Add-a-Node card and enter the agent's hostname or IP (for example `drone.local` or `192.168.1.50`). The GCS pairs with the agent directly over the LAN, stores the key locally, and contacts no cloud service.
Telemetry, video, and control flow over the LAN with no internet dependency. This is the default, local-first path; the cloud relay is only for reaching a drone on a different network.
## Running with SITL
ADOS ships with a SITL (Software In The Loop) launcher that runs a full ArduPilot simulation with real physics. This is useful for testing mission planning, flight modes, and the full MAVLink stack without hardware.
Follow the [ArduPilot SITL setup guide](https://ardupilot.org/dev/docs/building-setup-linux.html) to build ArduPilot from source. The SITL binary lands in `~/.ardupilot/`.
```bash theme={"theme":{"light":"github-light","dark":"github-dark"}}
cd ADOSMissionControl/tools/sitl
npm install
npm start
```
This launches ArduPilot SITL (a real autopilot running on your computer with simulated physics) and bridges its TCP output to a WebSocket that Mission Control can connect to.
In Mission Control, click **Connect** and choose the SITL WebSocket option. You will see a simulated ArduPilot copter with GPS, battery, and full parameter set.
You can arm, take off, switch modes, upload missions, and fly. The physics simulation includes gravity, drag, wind, and motor response. It is the same simulation that ArduPilot developers use.
## Running as a Desktop App
Mission Control can also run as an Electron desktop app. This gives you a standalone window with native serial port access (no WebSerial browser restrictions).
```bash theme={"theme":{"light":"github-light","dark":"github-dark"}}
# Development mode
npm run desktop:dev
# Demo mode
npm run desktop:demo
# Build distributable
npm run desktop:build:mac # macOS
npm run desktop:build # All platforms
```
The desktop app is the same codebase with an Electron wrapper. It uses about 200MB on disk and 200-300MB of RAM.
## Environment Variables
| Variable | Default | Purpose |
| ------------------------ | ------- | ---------------------------------------- |
| `NEXT_PUBLIC_DEMO_MODE` | `false` | Enable demo mode with 7 simulated drones |
| `PORT` | `4000` | Dev server port |
| `NEXT_PUBLIC_CONVEX_URL` | (none) | Convex backend URL for cloud features |
| `NEXT_PUBLIC_MQTT_URL` | (none) | MQTT broker URL for real-time telemetry |
Cloud features (fleet management, cloud relay, community changelog) require a Convex backend. For local development and direct connections, no backend is needed.
## Project Structure
A quick orientation of the codebase:
```
ADOSMissionControl/
├── src/
│ ├── app/ # Next.js App Router pages
│ ├── components/ # React components
│ ├── lib/
│ │ ├── protocol/ # MAVLink/MSP codec and adapters
│ │ ├── video/ # WebRTC client, transport cascade
│ │ └── mission/ # Mission file parsers, pattern generators
│ ├── stores/ # Zustand state stores (60+)
│ └── hooks/ # Custom React hooks
├── convex/ # Convex backend (optional, for cloud features)
├── tools/
│ ├── sitl/ # ArduPilot SITL launcher + WebSocket bridge
│ ├── mqtt-bridge/ # MQTT-to-Convex bridge (Docker)
│ └── video-relay/ # RTSP-to-WebSocket relay (Docker)
├── electron/ # Electron desktop wrapper
└── public/ # Static assets
```
## Next Steps
Connect a real flight controller and fly.
Install the agent on a companion computer.
Deep dive into the mission planner.
Explore all 60+ configuration panels.
Select your flight controller and click **Connect**. Mission Control will:
1. Open the serial port at the detected baud rate
2. Send a MAVLink heartbeat
3. Request autopilot version and capabilities
4. Request data streams (attitude, GPS, battery, RC, sensors)
5. Download the full parameter list
This takes 2-5 seconds.
The top bar will show the firmware type (ArduPilot, PX4, Betaflight, or iNav), vehicle type (Copter, Plane, Rover, etc.), and firmware version. The dashboard card will show live telemetry.
If connection fails, check:
* Is the FC powered?
* Is another application (Mission Planner, QGroundControl, Betaflight Configurator) holding the serial port?
* Are you using Chrome, Edge, or another Chromium-based browser? Firefox does not support WebSerial.
This applies to the **direct USB** path only. WebSerial, WebUSB, and Web Bluetooth need a secure context. On `http://localhost:4000` they work. To use these browser features from another machine over the network, you need HTTPS (or the [desktop app](#running-as-a-desktop-app), which has native serial access with no browser restriction). The hosted version at `command.altnautica.com` uses HTTPS.
This does **not** apply to connecting over the network to the ADOS Drone Agent or a MAVLink router. Those go over a WebSocket and need no secure context. See the plain-HTTP LAN self-host path below.
## Self-Hosting on the LAN over Plain HTTP
You do not need HTTPS, the cloud, or a Convex account to run Mission Control against a real drone on your own network. The ADOS Drone Agent serves plain HTTP on port `8080`, and the GCS connects to it directly.
Start the GCS on your own machine and open it over plain HTTP:
```bash theme={"theme":{"light":"github-light","dark":"github-dark"}}
npm run dev
```
Open `http://localhost:4000`, or reach it from another device on the LAN at `http://:4000`.
Keep the GCS on `http://` for LAN self-hosting. When the page is served over `https://`, the browser blocks it from fetching a plain-HTTP agent (mixed content), and the GCS falls back to the cloud relay. Plain HTTP keeps the connection local and direct.
In the fleet sidebar, use the Add-a-Node card and enter the agent's hostname or IP (for example `drone.local` or `192.168.1.50`). The GCS pairs with the agent directly over the LAN, stores the key locally, and contacts no cloud service.
Telemetry, video, and control flow over the LAN with no internet dependency. This is the default, local-first path; the cloud relay is only for reaching a drone on a different network.
## Running with SITL
ADOS ships with a SITL (Software In The Loop) launcher that runs a full ArduPilot simulation with real physics. This is useful for testing mission planning, flight modes, and the full MAVLink stack without hardware.
Follow the [ArduPilot SITL setup guide](https://ardupilot.org/dev/docs/building-setup-linux.html) to build ArduPilot from source. The SITL binary lands in `~/.ardupilot/`.
```bash theme={"theme":{"light":"github-light","dark":"github-dark"}}
cd ADOSMissionControl/tools/sitl
npm install
npm start
```
This launches ArduPilot SITL (a real autopilot running on your computer with simulated physics) and bridges its TCP output to a WebSocket that Mission Control can connect to.
In Mission Control, click **Connect** and choose the SITL WebSocket option. You will see a simulated ArduPilot copter with GPS, battery, and full parameter set.
You can arm, take off, switch modes, upload missions, and fly. The physics simulation includes gravity, drag, wind, and motor response. It is the same simulation that ArduPilot developers use.
## Running as a Desktop App
Mission Control can also run as an Electron desktop app. This gives you a standalone window with native serial port access (no WebSerial browser restrictions).
```bash theme={"theme":{"light":"github-light","dark":"github-dark"}}
# Development mode
npm run desktop:dev
# Demo mode
npm run desktop:demo
# Build distributable
npm run desktop:build:mac # macOS
npm run desktop:build # All platforms
```
The desktop app is the same codebase with an Electron wrapper. It uses about 200MB on disk and 200-300MB of RAM.
## Environment Variables
| Variable | Default | Purpose |
| ------------------------ | ------- | ---------------------------------------- |
| `NEXT_PUBLIC_DEMO_MODE` | `false` | Enable demo mode with 7 simulated drones |
| `PORT` | `4000` | Dev server port |
| `NEXT_PUBLIC_CONVEX_URL` | (none) | Convex backend URL for cloud features |
| `NEXT_PUBLIC_MQTT_URL` | (none) | MQTT broker URL for real-time telemetry |
Cloud features (fleet management, cloud relay, community changelog) require a Convex backend. For local development and direct connections, no backend is needed.
## Project Structure
A quick orientation of the codebase:
```
ADOSMissionControl/
├── src/
│ ├── app/ # Next.js App Router pages
│ ├── components/ # React components
│ ├── lib/
│ │ ├── protocol/ # MAVLink/MSP codec and adapters
│ │ ├── video/ # WebRTC client, transport cascade
│ │ └── mission/ # Mission file parsers, pattern generators
│ ├── stores/ # Zustand state stores (60+)
│ └── hooks/ # Custom React hooks
├── convex/ # Convex backend (optional, for cloud features)
├── tools/
│ ├── sitl/ # ArduPilot SITL launcher + WebSocket bridge
│ ├── mqtt-bridge/ # MQTT-to-Convex bridge (Docker)
│ └── video-relay/ # RTSP-to-WebSocket relay (Docker)
├── electron/ # Electron desktop wrapper
└── public/ # Static assets
```
## Next Steps
Connect a real flight controller and fly.
Install the agent on a companion computer.
Deep dive into the mission planner.
Explore all 60+ configuration panels.