

.adosplug extension. This page covers building and packing the archive, publishing it on a GitHub release, and installing it from a file.
Build the GCS bundle
If your plugin has a GCS half, build it first. In the ADOSExtensions monorepo:gcs/plugin.bundle.js. An agent-only plugin skips this step.
Pack
pack.sh lives at the monorepo root and takes a folder name or a path:
manifest.yaml, and writes an unsigned archive to extensions/my-plugin/dist/com.example.my-plugin-1.0.0.adosplug (the dist/ folder inside the extension).
For a Rust agent half use ./scripts/pack-rust.sh; pack.sh refuses Rust runtimes.
Sign
Every archive a production agent installs must be signed by a key the agent trusts. Key generation,sign.sh, ados plugin sign, enrolment and the bench mode for unsigned archives are on Signing keys.
Publish on GitHub
Tag your release and let a workflow pack, sign and upload the.signed.adosplug with its .sha256:
ADOSExtensions/.github/workflows/release.yml. On a <ext>-v<semver> tag it checks that the tag equals the manifest version, installs dependencies with pnpm install --frozen-lockfile, packs, signs, verifies the signature against the committed public key keys/<signer>.pub.pem, and uploads the archive with its .sha256. Copy it, then change the on.push.tags patterns, point ADOS_SIGNING_KEY at your own secret, set ADOS_SIGNING_KEY_ID to your signer id, and commit your public key as keys/<your-signer-id>.pub.pem.
Operators download the archive from your release page, or install it by URL (see URL install).
Install from Mission Control
Open the node from the fleet, switch to its Extensions tab, and click Install from file (see Install from Mission Control):- Drag the
.adosplugonto the dialog or click Choose file. - Review the manifest: name, version, signer, risk badge and requested permissions.
- Leave required permissions on and turn on the optional ones you want to grant.
- Click Install.
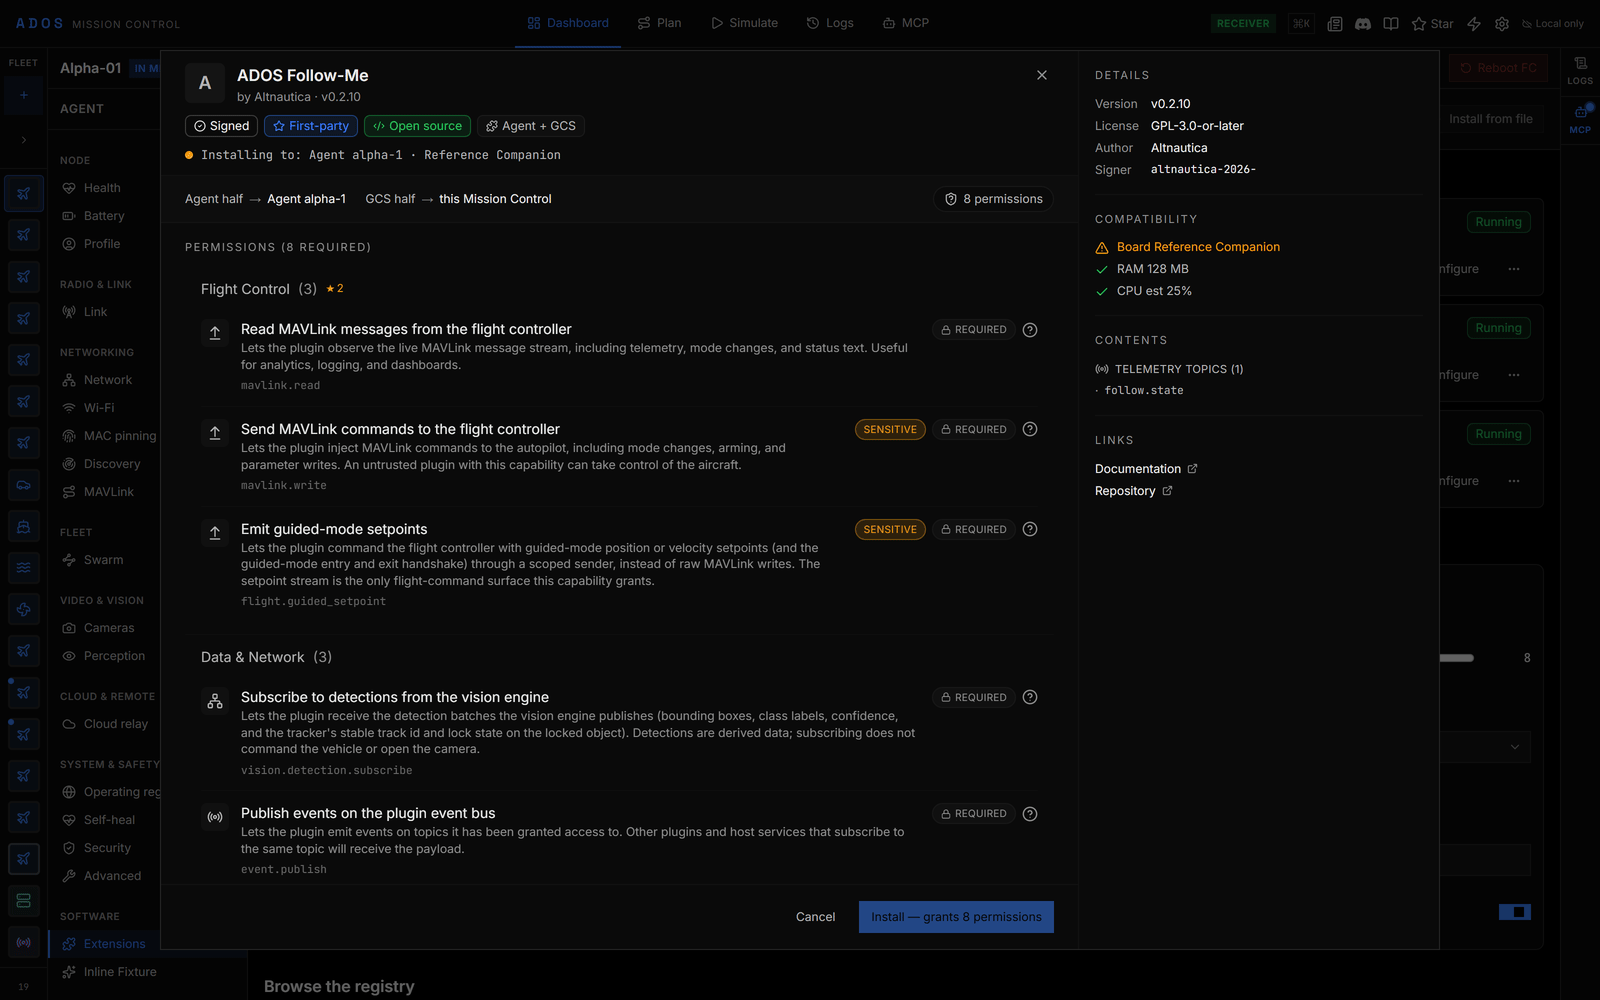
The install review after dropping a signed archive.
Install on the agent
ados plugin install SOURCE accepts an archive path, a built-in plugin id, an https archive URL from an allowlisted host, or a first-party catalog id. It verifies the signature, prints the requested permissions and asks for approval. --yes skips the prompt but refuses plugins that request high or critical permissions, which must be approved interactively. enable starts the plugin, disable stops it, and remove uninstalls it.
Logs are appended to /var/log/ados/plugins/<id-with-dashes>-<hash>.log. ados plugin logs <id> asks the agent for that path and tails it; --service <name> reads a declared service’s log instead. Every subcommand is on the Plugin CLI reference.
Catalog
First-party extensions are listed in a node’s Extensions tab and in the agent’s bundled catalog; see Catalog and registry. Third-party submission is not open; ship through GitHub Releases.Next steps
Signing keys
Generate, enrol and sign.
Linting
Check the archive before you publish.