

What you need
- An HDMI cable (a Pi 4B uses micro-HDMI) and any HDMI monitor.
- A USB or Bluetooth gamepad.
How it starts
Theados-kiosk service runs on every ground station unless you turn it off:
- It stands down when
ground_station.kiosk.enabledisfalseorground_station.display.typeislcdornone. - It waits for any connected display, checking every DRM card rather than assuming
card0, and keeps waiting, so a monitor plugged in long after boot still gets the cockpit. - It waits up to 90 seconds for the cockpit at
http://localhost:8080/cockpit/?kiosk=1to answer, so the screen never lands on an error page. - It launches Chromium full screen: under the
cagecompositor on a board with no desktop, or as a full-screen window inside a running desktop session.
enabled or the resolution restarts or stops it without a reboot. Without HDMI the rest of the ground station works normally.
The cockpit
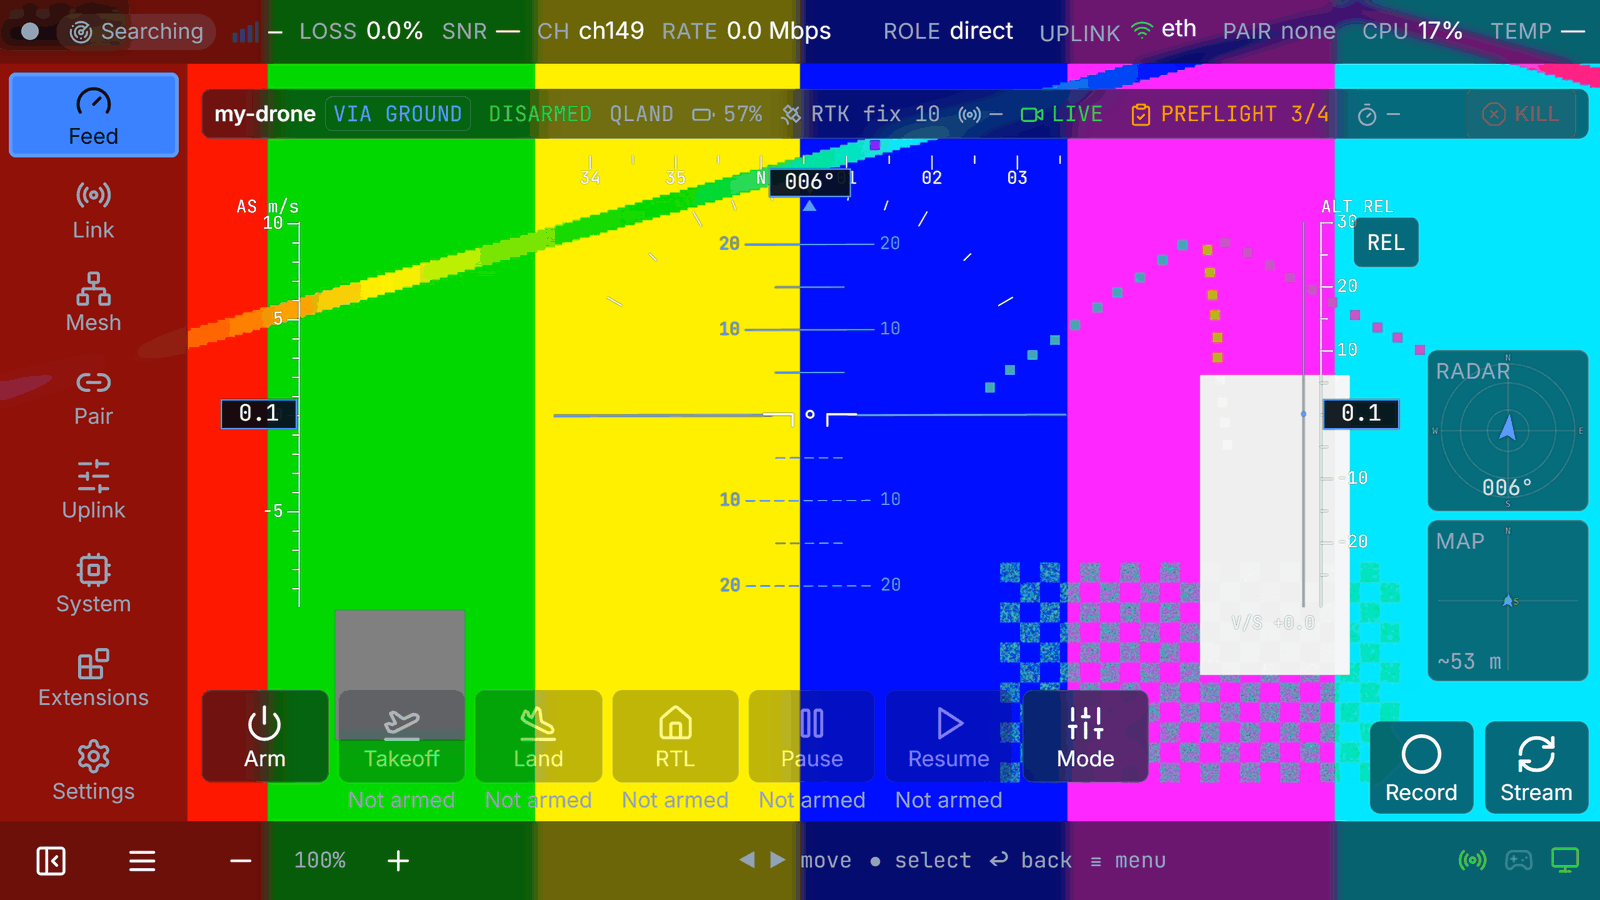
The on-box cockpit on an HDMI monitor: full-frame video (a test pattern here) with the safety band, HUD, radar, mini-map and skill bar.
/api/telemetry endpoint, polled at 5 Hz.
Gamepad input
USB gamepads work immediately. Pair a Bluetooth gamepad first, from Mission Control (node panel, Buttons) or withPOST /api/v1/ground-station/bluetooth/scan and POST /api/v1/ground-station/bluetooth/pair.
In the cockpit the gamepad navigates the menus and fires the bound skills (Arm/Disarm, Takeoff, Land, RTL). Manual stick control from a ground station is carried by the ELRS/CRSF control lane, which reads the primary gamepad when it is enabled. See ELRS/CRSF control lane.
Pilot-in-command
A gamepad on the kiosk claims pilot-in-command (PIC) automatically when no one holds it. Other clients watch until they claim PIC. Claim or release PIC from Mission Control or the cockpit; the agent routes arePOST /api/v1/ground-station/pic/claim and POST /api/v1/ground-station/pic/release.
If the PIC client disconnects, the agent clears the claim and sends nothing on its behalf. What the aircraft does next is decided by the flight controller’s own RC-loss and GCS-loss failsafe. Configure and bench-test that failsafe before flying from the kiosk.
Display settings
The kiosk resolution isground_station.kiosk.resolution: auto (keep the mode the compositor picked), 720p or 1080p. Set it from Mission Control (node panel, Display) or with PUT /api/v1/ground-station/display.
When things change
Next steps
ELRS/CRSF control lane
Stick control from the ground station.
Front panel
The OLED, buttons and touch LCD.