Per-drone Overview with video feed, telemetry strip, and flight controls
Overview Layout
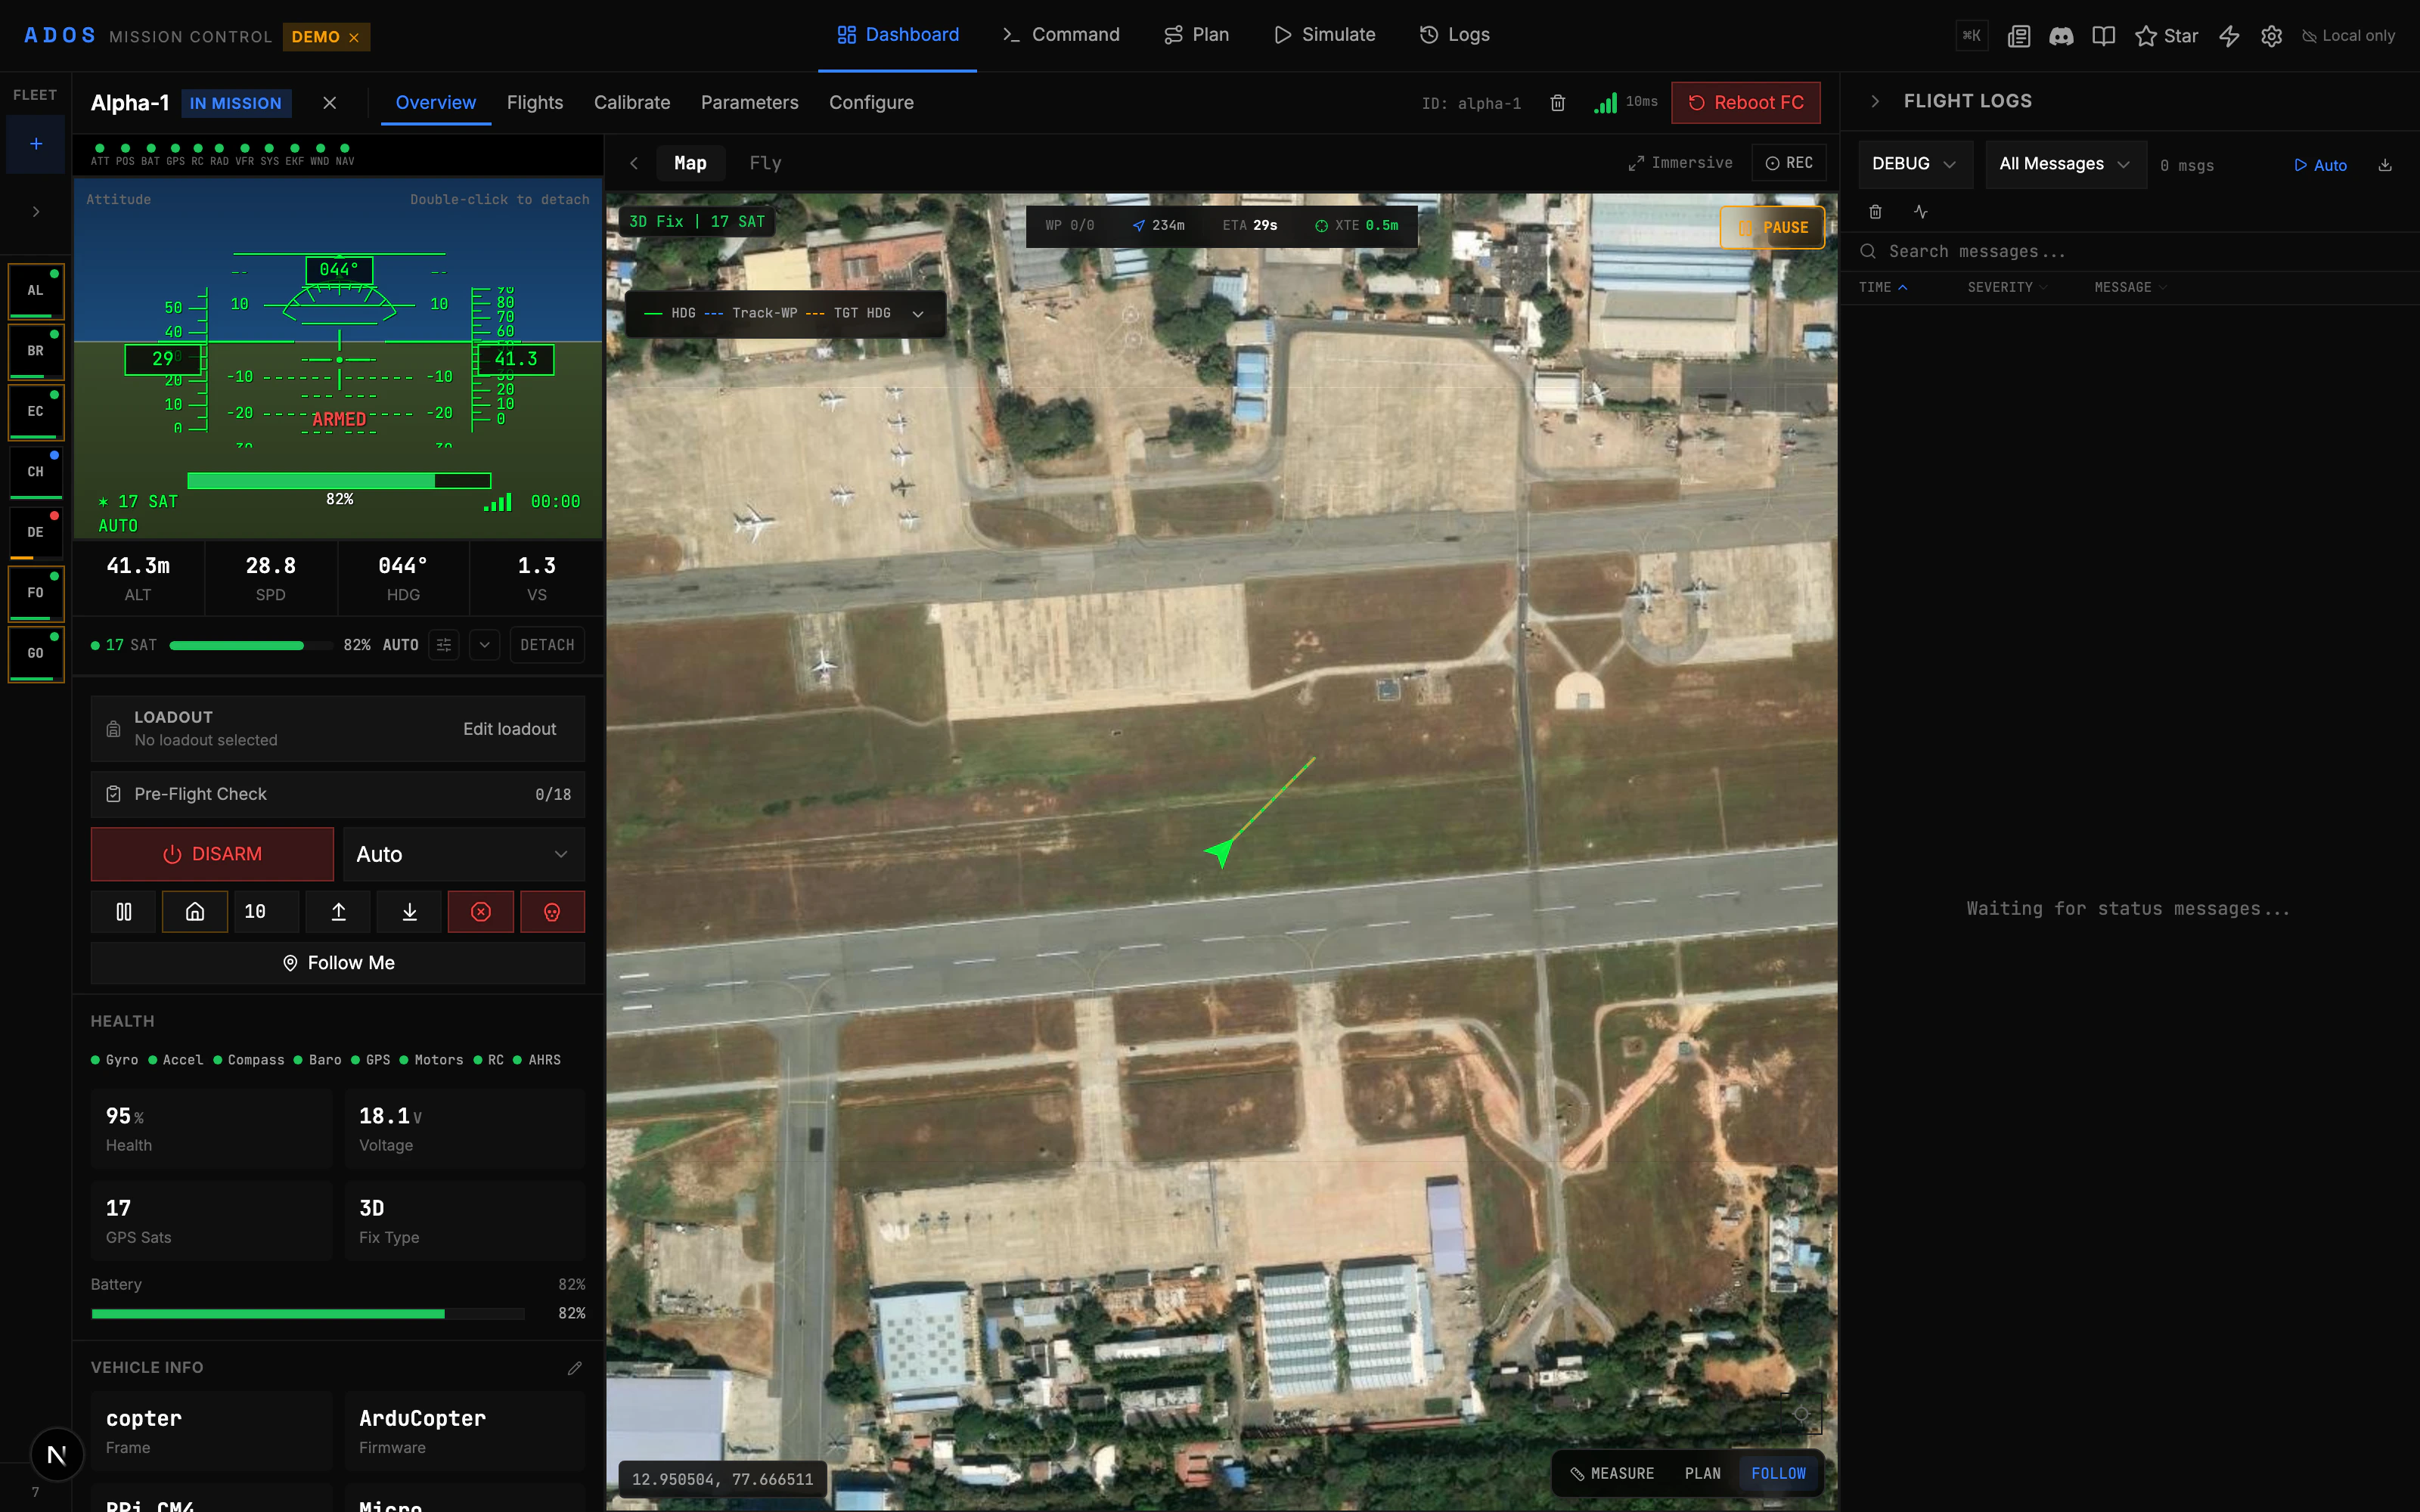
The Overview surface has several areas:- Video feed (center): Live camera stream from the drone, with OSD overlay
- Telemetry strip (bottom or side): Attitude, speed, altitude, battery, GPS
- Actions panel (right): Arm/disarm, mode change, guided commands
- Fleet sidebar (left): Drone selection when multiple are connected
- Mini-map (corner): Overhead view of drone position
Gamepad Control
Mission Control supports gamepad and HOTAS input at 50 Hz using the Web Gamepad API. When a gamepad is connected, the GCS sendsMANUAL_CONTROL MAVLink messages directly to the flight controller.
Supported input devices:
- Xbox controllers (wired and wireless)
- PlayStation DualShock/DualSense
- Logitech gamepads
- HOTAS (Hands On Throttle And Stick) setups
- Any HID gamepad recognized by the Web Gamepad API
How It Works
- Connect a gamepad to your computer (USB or Bluetooth).
- The browser detects it automatically via the Gamepad API.
- Mission Control polls the gamepad at 50 Hz (every 20ms).
- Stick positions are mapped to roll, pitch, throttle, and yaw.
MANUAL_CONTROLmessages are sent to the flight controller at 50 Hz.
Input Mapping
The default mapping follows standard RC conventions:
You can customize the input mapping in Settings > Input.
Keyboard Control
For quick commands without a gamepad, keyboard shortcuts are available:Keyboard controls work in guided mode for position nudging. For full 4-axis manual flight control, use a gamepad or HOTAS.
Guided Mode
Guided mode lets you command the drone to fly to specific positions. In this mode, you can:- Click the map to set a guided waypoint. The drone flies to that position.
- Set altitude before sending the goto command.
- Use keyboard arrows to nudge the drone’s position incrementally.
Automated Flight Behaviors
Higher-level flight behaviors (Follow-Me, Orbit, QuickShots, obstacle avoidance, precision landing) ship as extensions through the ADOS Extensions registry rather than as a built-in catalog. Browse the Extensions tab on the per-drone view to install behaviors that match your hardware and mission. Extensions contribute their own UI tabs and controls scoped to the drone you install them on, so a behavior available on one drone in your fleet does not have to be active on the others.Actions Panel
The actions panel on the right side provides direct control buttons:- Arm / Disarm with a safety confirmation dialog
- Flight mode selector showing all available modes for the connected firmware
- Return to Launch (RTL) button
- Land button
- Takeoff button with altitude input
- Pre-flight checklist to verify readiness before flight
- Failsafe alert banner showing active failsafe conditions
Pre-Flight Checklist
Before arming, the pre-flight checklist helps you verify that your drone is ready:- GPS lock status
- Battery level
- Pre-arm check results from the FC
- Sensor health
- RC input status
- Geofence configured (if applicable)
OSD Overlay
When video is active, an on-screen display (OSD) overlay shows key telemetry data on top of the video feed:- Altitude, speed, heading
- Battery voltage and percentage
- Flight mode
- GPS satellite count
- Home direction and distance
- Armed status
Telemetry Strip
The telemetry strip at the bottom shows real-time flight data in a compact format. See the Telemetry page for details on all available readouts.Mission Execution
When a mission is active, the Overview surface shows mission execution progress:- Current waypoint indicator
- Distance to next waypoint
- Mission completion percentage
- Elapsed time