

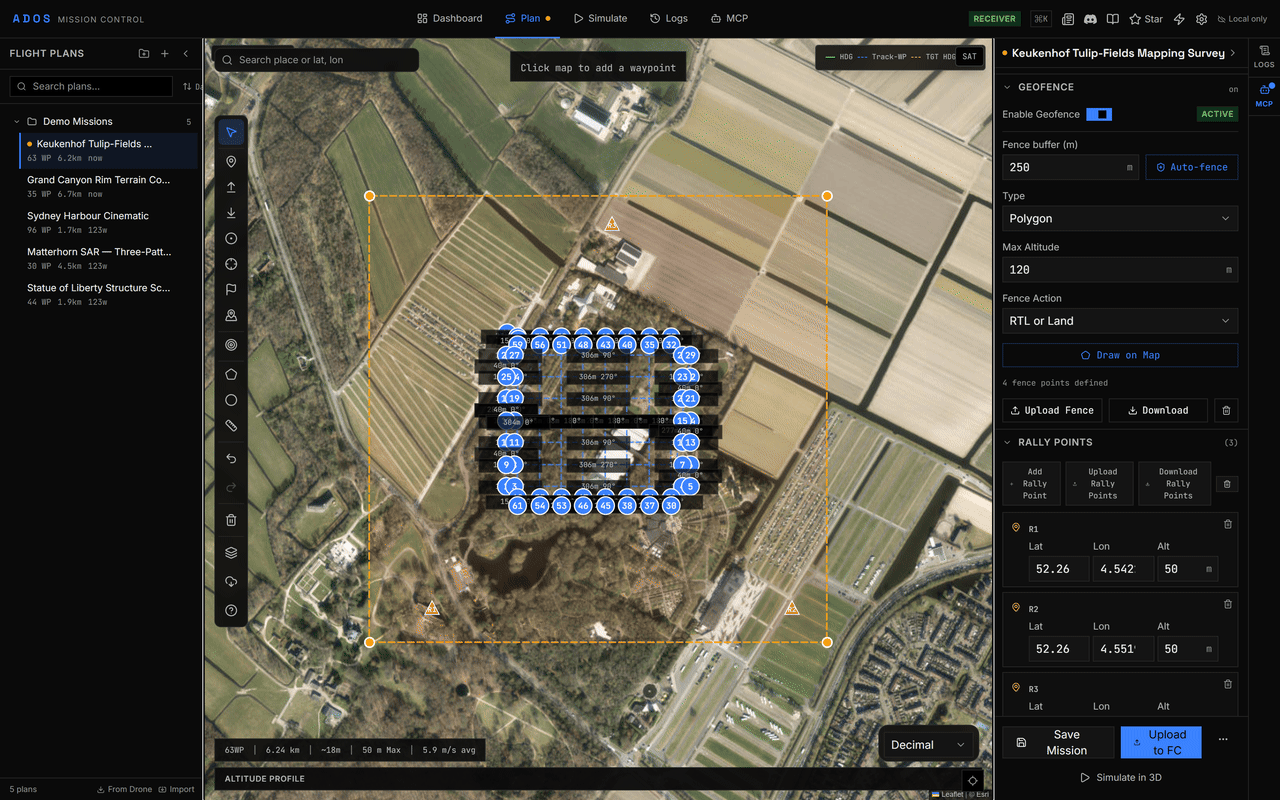
A polygon geofence and three rally points, with the Geofence and Rally Points sections expanded.
Geofence
The Geofence section holds the fence for the current plan.Create a fence
1
Open the Geofence section
In the Plan tab, expand Geofence in the right panel and switch on Enable Geofence.
2
Draw the boundary
Pick Polygon or Circle under Type, click Draw on Map and draw the shape. Or click Auto-fence to build a polygon around the plan with the buffer you set.
3
Set the ceiling and the action
Enter Max Altitude and choose the Fence Action.
4
Upload
Click Upload Fence. Mission Control sends the fence points over the MAVLink mission protocol (fence mission type) and writes the fence parameters, including
FENCE_ENABLE, FENCE_TYPE, FENCE_ACTION and FENCE_ALT_MAX.Inclusion and exclusion zones
A fence can carry extra zones: inclusion zones the aircraft must stay inside and exclusion zones it must stay out of. Add and edit zones, and toggle a zone between inclusion and exclusion, in the node’s Setup tab under SAFETY → Geofence. On download, the first inclusion shape becomes the main fence and the rest become zones. Mission validation checks waypoints, legs and rally points against the fence and every zone, and blocks upload when one falls outside. See Mission validation.iNav uses geozones instead of the ArduPilot fence. See iNav guide.
Rally points
When the flight controller returns to launch, it can fly to the nearest rally point instead of home. Use them when home may be blocked, or when a closer safe landing area exists.1
Place points
Choose the Rally point tool (
Y) and click the map. Each point appears in the Rally Points section.2
Set altitudes
Set the Altitude of each point in the section.
3
Upload
Click Upload Rally Points. Use Download Rally Points to read the points stored on the aircraft, and Clear All to remove them from the plan (undo restores them).
On ArduPilot,
RALLY_LIMIT_KM sets how far from home a rally point can be and still be used. Points farther away are ignored. Set it in the Parameters tab to cover your operating area.A typical setup
- A polygon fence around the whole operating area, with a ceiling.
- Exclusion zones around buildings, roads or people.
- Three or four rally points in clear landing areas inside the fence.
Next steps
Mission planning
Validate and upload the full plan.
3D mission preview
Preview the mission, fence and rally points in 3D.